How to Build a GPU Mining Rig in 2023
Miners were using mining machines to earn some bitcoins as a reward in past but electricity consumption was the biggest issue there, GPU mining is a great idea that helps miners to save electricity and mine different coins on a single system, moreover, it is the best passive income idea while you are doing nothing, having no boss or sub-ordinates to accomplish your targets. Without further ado, let’s go through the necessary computer peripherals used for GPU Mining.
Make the Mining Rig Frame First
The first step is to make the mining rig frame properly, try to install all computer peripherals and hardware components with some extra care, and remember one thing, any minor mistake can cause a huge problem, this way you can lose graphics cards or motherboards.
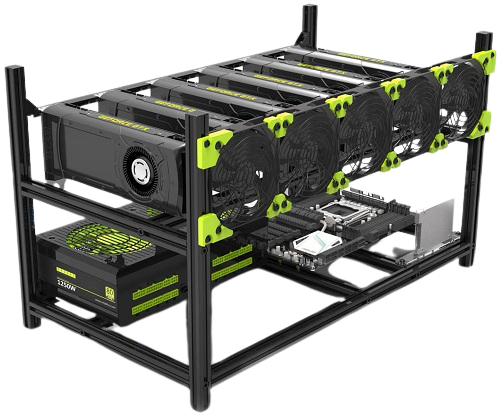
Talking about the types of a Mining rig frames is not important, you can use any rig frame as per your budget, what is important is that you must be capable to make a rig and install your motherboard, Power supply, and Graphics Cards properly otherwise it is useless to think about the type or methods of mining, let’s go further and make a rig from scratch.
How to Build a GPU Mining Rig in 2023
List of Items required to build a Mining Rig:
Mining Rig Frame
First of all, you need a frame, whether it is an expensive Mining Rig Frame purchased by Amazon or a cheap one made of wood, it doesn’t matter what kind of Ming Rig Frame you have, all you need is to just have a structured based Frame to place your graphics cards, motherboard and Supply properly.

If you don’t want to purchase the mining frame, I will highly recommend you to follow this video and make your own mining rig frame.
Motherboard
The motherboard is very important while making the GPU mining rig, there are different options you can choose a motherboard with 6 PCIe, 8 PCIe, 12PCIe, 13PCIe and 24 PCIe slots, but I will highly recommend you choose only 6 GPU Mining motherboards due to many reasons.

If you don’t know how to install Graphics cards on the motherboard, you must know more and more about the motherboard because it is really technical job to do, some people hire the services of experts but I would recommend you to go through step by step process and never forget to read the user’s guide properly.

| 1. CPU socket | 2. RAM | 3. PCIex 1 |
| 4. PCIex 2 | 5. PCIex 3 | 6. PCIex 4 |
| 7. PCIex 5 | 8. PCIex 6 | 9. M.2 SSD |
| 10. USB Gen1 header | 11. CPU power connector | 12. Fan headers |
| 13. ATX power connector | 14. SATA ports | 15. Front panel header |
| 16. USB Gen1 header | 17. USB 2. header | 18. COM/Serial header |
| 19. analog audio front panel | 20. TPM header |
Don’t worry about the USB and front panel ports, just focus upon the power connectors, CPU socket, RAM and PCIex1 to PCIe6 (Here you will attach your graphics cards)
You should check out this video first before going further.
How to install Motherboard never forget to watch this exclusive and detailed video
Processor & RAM
The processor must be compatible with the motherboard can help you to provide consistent performance, remember that it also depends upon the way of mining, if you are mining on a Linux server you don’t need too much RAM and an expensive processor to run your system, in fact, you can use any processor of generation 3 plus with core i3 plus, here CPU socket is LGA 1151, let’s find out the best processor for this mining rig.

In order to avoid any damage, you should buy a combo option with the motherboard, Processor, RAM, and cooling fan, you know it is quite hard to find a compatible cooling fan for the processor, don’t worry some motherboards come with RAM and processor along with fans, that can be expensive, it is better to purchase the processor, RAM and fans separately.
* Don’t try to waste too much money on RAM, 8 GB is more than enough for a mining rig to make your processing overall smooth and efficient, otherwise, you can also use 4GB for a mining rig because you are majorly concerned with graphics cards only for mining.
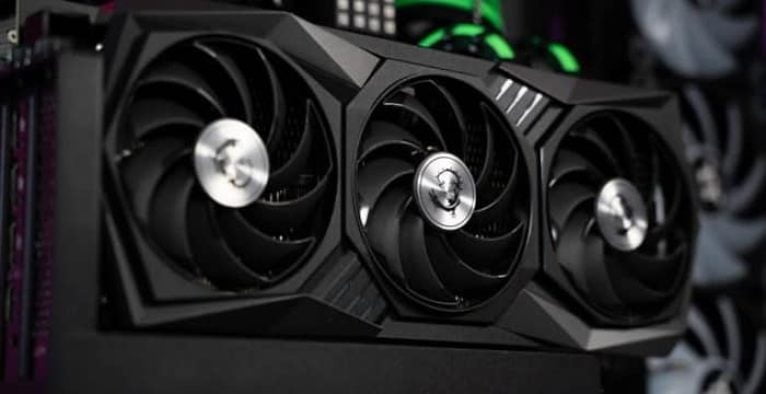
Graphics Cards
A graphics card is a piece of hardware found in most computers that provides graphical data of your computer. It may sound quite confusing, but we’ll try our best to simplify it.
Graphics cards provide the graphics processing units for your computer and its monitor. The graphics card receives information from the CPU and outputs it on a monitor. One way to look at the graphics card is as a translator, and all your physical interactions with your monitor or TV are translated into those cool visual effects that we love so much.
It must do this very quickly as well, as modern games require some serious number-crunching power to render those visuals before your eyes, and it’s up to the graphical processing unit on the graphics card to handle all those calculations.

There are so many options available right now when it comes to graphics cards, if you can afford the most expensive graphics cards you have better chances to get more Hashrate and mining more and more coins but for beginners, it is recommended to choose the most affordable MSI graphics cards and make a rig of that because it is said “Don’t put all eggs in one basket”, make a portfolio according to your financial strength.
Power Supply
The power supply or PSU should be the most important thing when going to make a rig, you need the power supply that can bear the electricity requirements of the motherboard and graphics cards, suppose if you have a mining rig of six graphics cards (MSI Gaming GeForce RTX 3060 12GB) each card approximately consumes 250 watts so 250×6 = 1500 watts, overall, you need a power supply of 1800+ watts, the more powerful supply is the better you can run your mining rig without being heated.

There are several other options you can use when it comes to power supply, most people use refurbished graphics cards along with a used power supply but it is not the recommended way to start mining because a minor electricity fluctuation can damage your entire mining rig.
Risers
Quality is everything that’s why I recommend you to choose the perfect Riser for your mining rig, usually, a rig can drop the Hashrate of 2 on each graphics card, the poor quality can decrease the overall Hashrate of all graphics cards.
There is a complete guide on the riser you can easily know what is a PCIe riser in detail, this information is really important to understand, you will understand what is Molex, slot, and SATA cable.
16GB Flash/USB
A required list of Mining Rig also includes a 16Gb flash drive you can use it when using Linux software for mining, check your desired USB or Flash drive.

SSD Drive
SSD drive can be used for Windows-based mining but it is not recommended, several experts suggest Linux-based mining rather than windows-based because the same graphics card shows different hash rates on Linux and windows. You need to buy this SSD drive for mining.

After building a mining rig, you need to restart your rig multiple times, this technique will erase any bug or error, sometimes there are no graphics cards on HiveOS (For Linux-based mining), you can use other software tools for mining, it depends upon the pool you are using. If you are interested to learn more, you must know about how GPU mining rig work and it will add value to your knowledge.
Conclusion:
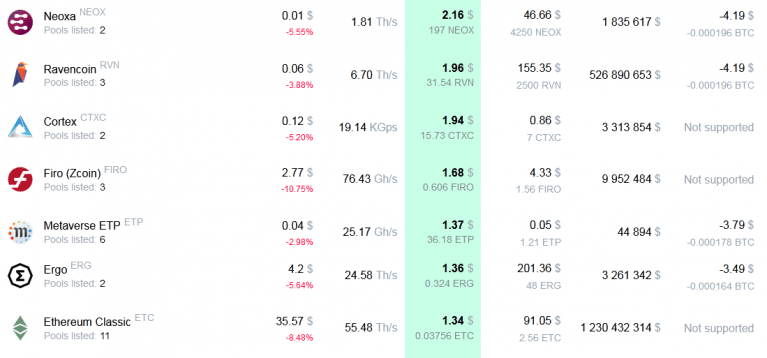
Recently Ethereum has migrated from PoW to PoS and now mining cryptocurrency is a little bit difficult since you will not even touch the breakeven if you buy some MSI graphics cards or Nvidia GPUs, the first thing in our mind as a miner is to get back our investment as quickly as possible and Ethereum was the best choice that was almost giving double profits.
If you can afford to bear electricity charges, you are free to go on with mining rigs, but I will suggest you to please wait for a few months until the GPU prices go down, when the prices will decrease and the market will gain momentum back, then mining will become a fruitful business for us. People now are mining Ravencoin after Ethereum merge.